Thursday, May 30, 2013

My Outdoor Craft Fair Booth

I had a booth in the Flatrock Music and Arts Festival last weekend. It was a fun event. The weather was beautiful, and the music was really good. There were a bunch of food trucks out there as well. I didn't get a chance to try any of them. (In fact, funny story. I packed pasta salad for lunch and forgot to pack a fork.) But, I saw a lot of people walking by with some very yummy-looking food. It was my first outdoor craft show, and for a first attempt, I think my tent turned out very well.


Here's an overview of the booth. I printed a couple of signs on cardstock that said that I accept credit cards and take custom orders. I'll probably place them somewhere else in the future. I don't think people really saw them.


I got the ladder at an antique store in town. I absolutely adore it. A friend of mine made the sign at the top. I made the baskets holding the bracelets, and I got the little bucket and the bin from Target.


Here, I covered a bulletin board with some burlap I bought at Jo-Ann and attached the necklaces to the board with push pins. I found some cute ones at Target.


I bought some cord from Jo-Ann and hung it from the corners of the tent to hang some clutches and market bags.


And, here's my table. I got the shutter at the same time as the ladder. It worked great to hold those little brooches. I printed up cards on some blue cardstock scrapbook paper and punched holes in them with a tapestry needle to hold the brooches. I adore the little coke crate wagon, and it got a lot of compliments. My husband's grandfather made it for him, and now it's my son's. I borrowed it for the day to use as a display.


-Katy

Wednesday, June 27, 2012

Link: The best way to cook sausage

Click on the image above to read a post by the great Kenji at Serious Eats about the best way to cook sausage. With my son's birthday party coming up in a week and a half, this couldn't be better timed for me.

-Katy

Monday, June 25, 2012

Baked squash blossoms

I've wanted to make squash blossoms ever since I found out they were a thing. I remember hearing Sookie St. James on Gilmore Girls rave about people expecting her stuffed fried squash blossoms and thinking, "I don't know what that is, but it sounds delicious." I've seen recipes here and there on the food blogs I follow, and they always looked so pretty. I've just never actually been able to find squash blossoms. So when I saw them at the farmers market on Saturday at $2 for a dozen, I jumped at the chance to finally try them. I baked half of them last night, and sometime this week, I'm going to try a dessert recipe I found.
photo by storeyland
Ingredients
6 squash blossoms

Filling:
1/2 c ricotta cheese
1/4 c parmesan cheese
1 egg
1 T fresh basil, chiffonade
salt and pepper, to taste

Coating:
1 egg
1 T water
Panko bread crumbs

Directions

  1. Preheat oven to 400 degrees. Cut off the stem of the blooms if necessary.
  2. Stir together all the filling ingredients with a fork until combined. Carefully spoon mixture into squash blossoms. How much you use will depend on the size of the blooms, but it will probably be around a tablespoon or two. Twist the tops of the petals together to close.
  3. Whisk together the water and eggs and brush onto the outside of the blooms, coating all sides. Carefully roll the blooms in the panko crumbs and arrange on a greased baking pan.
  4. Bake at 400 degrees for approximately 25 minutes.

-Katy

Thursday, June 14, 2012

Sauteed squash

I improvised this recipe Tuesday afternoon when I was short a vegetable for my son's lunch, and it turned out really well. My son really ate it up, which makes me glad since his daddy doesn't like squash. I made this with yellow squash, but it should work with zucchini, pattypan, or any summer squash.

Ingredients
1 squash, cut into 1/8" slices
1/2 T butter
1/2 T olive oil
1/2 t dried thyme (fresh would be better)
a splash of red wine vinegar (I would have preferred lemon juice, but it's what I had)
salt & pepper, to taste

Directions

  1. Heat a 10"-12" saute pan over medium high heat. Add butter, olive oil, squash, and a bit of salt and pepper. Stir or shake to get squash as close to a single layer as you can.
  2. Leave it alone for at least 30 seconds. Toss to flip or use a spatula to flip if you aren't comfortable tossing it.
  3. Repeat the process of leaving it alone and flipping until you get some nice brown spots on your squash.
  4. Add thyme and vinegar or lemon juice. Stir, shake, or toss until the vinegar or lemon juice evaporates. Adjust the seasonings to taste.


-Katy

Wednesday, June 6, 2012

Ask a grown man

I may have found the best thing to ever originate from an online magazine for teen girls, Ask a Grown Man. Questions are submitted by teen girls and answered by grown male celebrities. I had forgotten how much teen girls are obsessed with boys. I would recommend starting with Paul Rudd.

-Katy

Monday, June 4, 2012

The first farmers market trip of the year

The farmers market in my town opened for the first weekend of the summer this Saturday, so my son and I went for a little field trip. I can't speak for him, but I had a blast. I got some local honey, a pint of blackberries for $2, green beans, tomatoes, and a massive head of cauliflower.
Seriously, look at the size of this thing.
To give you an idea of just how massive this cauliflower was. I took a picture when I put some in the toaster oven to roast. (I seriously love my new toaster oven. I can roast things without heating up the kitchen, which is great considering it's in the 90's most days.) I just tossed it in a little melted butter, salt, and pepper, set the toaster oven to 400 degrees and watched the cauliflower until it got some nice brown bits on it. What you see below isn't even a quarter of that head of cauliflower. And it was delicious by the way.


-Katy

Thursday, May 31, 2012

Every major's terrible?

The exceptionally clever people at xkcd have done it again. Click the picture to be taken to the comic of a clever little ditty about why every college major is terrible.  Someone has even attempted to sing it.

My major isn't mentioned. Does that mean it isn't terrible or that it's so terrible that it doesn't deserve to me mentioned?  Hmmm....

 -Katy

Tuesday, May 22, 2012

Corn in a toaster oven? Who woulda thunk!

May has been hot in my neck of the woods. There have been a few days where our air conditioner just couldn't keep up, and it's supposed to be over 100 degrees on Thursday. (Ouch!) So, I'm trying to avoid turning on my oven as much as possible. If I use the oven on one of those days where the air conditioner is straining, the house doesn't cool down until well after sunset, and who wants that?

Lucky me, my husband got me a toaster oven for Mother's Day. (Really, it's okay. We've been talking about how much we wanted one for years. I mean, literally, years.) We've had a rough month with illness running its way around our family, so last night was the first time I used it, and I really went all out. No toasted bagels or frozen waffles for me. No, what's the first thing I made in my toaster oven? Roasted corn. And, it turned out great. I am so proud of my little toaster oven.

Directions

  1. Soak the corn, in husk, in salt water for several hours. If you can't submerge all the corn, put the end where the silk sticks out on the bottom. I don't know if it actually works, but I imagine that capillary action brings the salt water up into the corn through the silk. Even if it doesn't actually work that way, I've always gotten good results by doing it like that.
  2. Place the rack in your toaster oven on the lowest slot and set your toaster oven to bake at 350 degrees. Take the corn out of the water, and using kitchen shears, snip off the silk hanging from the top and any loose bits of husk or parts that stick out.
  3. Put the corn on a small pan and place on the rack in the toaster oven. Bake for 30 minutes, turning once halfway through.


-Katy

Thursday, May 17, 2012

Tip: Use Naan as pizza crust

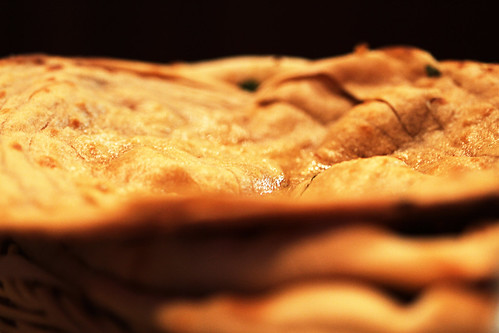
I saw an interesting tip in the Publix ad the other week. Next to the picture of Tandoori Naan on sale was the suggestion to use Naan to make pizza. I thought it sounded like an odd mix of cuisines, but I thought it was worth a try. I bought a package of two of the garlic Naan, as well as some fresh mozzarella and sauce. It was delicious, and they were a good size for individual pizzas.

Photo by MoHotta18
 I've made this twice now, and I have a couple of tips I've learned from the experience. You'll want to use less sauce than a pizza made from dough. The sauce doesn't absorb as much, so the sauce is more likely to form a slick under your cheese. Nobody likes to take a bite of their pizza and have all the cheese slide off. Second, put the Naan directly on the rack in the oven or put it on a cooling rack and put that in the oven for easier removal. If you put it on a cookie sheet, the bottom doesn't crisp up and you end up with a pretty floppy pizza. With the bottom unshielded from the heat of the oven, the bottom crisps up nicely without burning and the crust holds up better to the toppings, which makes the pizza easier to eat.


Naan Pizza

Ingredients
2 pieces of garlic Naan
Pasta or pizza sauce
Fresh mozzarella, shredded
Other toppings of your choice (i.e. red pepper flakes, basil, pepperoni, etc.)

Directions
Build your pizza on a peel or cooling rack depending on whether you will cook it on the oven's rack or the cooling rack. Preheat the oven to 400 degrees.
Add desired toppings to Naans and transfer to the center rack of the oven. Rather than timing the pizza, keep an eye on it, and pull it out when the cheese gets to your preferred point of brown and bubbly. (It's nice that you don't have to make sure the crust is cooked.)

- Katy

Friday, May 4, 2012

Holy Moley, Guacamole!

I saw a recipe in my inbox the other day for "Healthified Guacamole." Curious, I clicked on the email to see what they did to make guacamole healthier. I was thinking it was pretty healthy to begin with. I mean, the avocado is kind of high in fat, but it's all good healthy fat, and there are plenty of nutrients in guacamole as well. Lo, and behold, the recipe I saw before me was simply a standard recipe for guacamole. What kind of guacamole had the writers of this email recipe been eating? (Though I admit, I was glad to see that hadn't done something weird to mess with guacamole. I mean, let's just admit it. A good batch of guacamole is basically perfect food.)
guacamole
photo by stu_spivack

I love making guacamole at home. It's so hard to find a good store bought guacamole and generally cheaper to make it at home, especially right now when the grocery stores are all having their Cinco de Mayo sales. If you're looking for a good store bought guac, I like Trader Joe's the best and Wholly Guacamole the second best. If you're looking to make your own, read on. My version is adapted off of this Alton Brown recipe. I do a couple of things to it that may make it inauthentic, but I like it, so I don't care.

Ingredients
3 avocados
1 small lemon
1/2 medium red onion, diced
2 plum tomatoes, diced
2 cloves garlic, minced
1 small handful of cilantro, chopped (should come to about 1 T after chopping)
a few jarred jalapeno slices, minced
salt and pepper, to taste

Directions
1) Cut the avocados in half and remove the seeds. Cut the avocado in cubes by scoring a grid into the avocado through to the skin and then scoop out with a large spoon. If the avocado is nice and ripe and soft as it should be, your cubes won't be perfect, which is fine. I like to think of the cubes of avocado in my guacamole as the bread cubes in a bread pudding. Some will remain fairly intact and some will break up completely to make a nice balance between creamy and chunky.
2) Dump avocado pieces into a large bowl and squeeze the juice from the lemon onto them and toss to coat.
3) Add the onion, tomatoes, garlic, cilantro and jalapenos, and stir to combine. Season with salt and pepper to taste. If you can wait to eat it, let it sit for about an hour to let the flavors meld.

For variations, you can mash the avocado before adding the rest of the ingredients. You can use a lime instead of a lemon. You can also add some spices such as cayenne, cumin, or chili powder. If you're looking to be more authentic, leave out the jalapenos.

-Katy