Showing posts with label tips. Show all posts

Tuesday, May 22, 2012

Corn in a toaster oven? Who woulda thunk!

May has been hot in my neck of the woods. There have been a few days where our air conditioner just couldn't keep up, and it's supposed to be over 100 degrees on Thursday. (Ouch!) So, I'm trying to avoid turning on my oven as much as possible. If I use the oven on one of those days where the air conditioner is straining, the house doesn't cool down until well after sunset, and who wants that?

Lucky me, my husband got me a toaster oven for Mother's Day. (Really, it's okay. We've been talking about how much we wanted one for years. I mean, literally, years.) We've had a rough month with illness running its way around our family, so last night was the first time I used it, and I really went all out. No toasted bagels or frozen waffles for me. No, what's the first thing I made in my toaster oven? Roasted corn. And, it turned out great. I am so proud of my little toaster oven.

Directions

  1. Soak the corn, in husk, in salt water for several hours. If you can't submerge all the corn, put the end where the silk sticks out on the bottom. I don't know if it actually works, but I imagine that capillary action brings the salt water up into the corn through the silk. Even if it doesn't actually work that way, I've always gotten good results by doing it like that.
  2. Place the rack in your toaster oven on the lowest slot and set your toaster oven to bake at 350 degrees. Take the corn out of the water, and using kitchen shears, snip off the silk hanging from the top and any loose bits of husk or parts that stick out.
  3. Put the corn on a small pan and place on the rack in the toaster oven. Bake for 30 minutes, turning once halfway through.


-Katy

Thursday, May 17, 2012

Tip: Use Naan as pizza crust

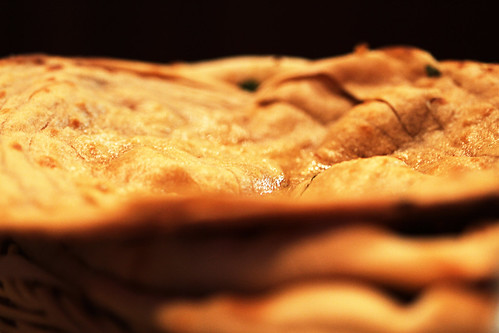
I saw an interesting tip in the Publix ad the other week. Next to the picture of Tandoori Naan on sale was the suggestion to use Naan to make pizza. I thought it sounded like an odd mix of cuisines, but I thought it was worth a try. I bought a package of two of the garlic Naan, as well as some fresh mozzarella and sauce. It was delicious, and they were a good size for individual pizzas.

Photo by MoHotta18
 I've made this twice now, and I have a couple of tips I've learned from the experience. You'll want to use less sauce than a pizza made from dough. The sauce doesn't absorb as much, so the sauce is more likely to form a slick under your cheese. Nobody likes to take a bite of their pizza and have all the cheese slide off. Second, put the Naan directly on the rack in the oven or put it on a cooling rack and put that in the oven for easier removal. If you put it on a cookie sheet, the bottom doesn't crisp up and you end up with a pretty floppy pizza. With the bottom unshielded from the heat of the oven, the bottom crisps up nicely without burning and the crust holds up better to the toppings, which makes the pizza easier to eat.


Naan Pizza

Ingredients
2 pieces of garlic Naan
Pasta or pizza sauce
Fresh mozzarella, shredded
Other toppings of your choice (i.e. red pepper flakes, basil, pepperoni, etc.)

Directions
Build your pizza on a peel or cooling rack depending on whether you will cook it on the oven's rack or the cooling rack. Preheat the oven to 400 degrees.
Add desired toppings to Naans and transfer to the center rack of the oven. Rather than timing the pizza, keep an eye on it, and pull it out when the cheese gets to your preferred point of brown and bubbly. (It's nice that you don't have to make sure the crust is cooked.)

- Katy

Thursday, April 26, 2012

Cheesecake tips and tricks


This post at The Kitchn has some great tips for baking a great cheesecake. I heartily agree with all the tips, and I had never heard the tip to chill your cheesecake for at least six hours. I always just let it come to room temperature on the counter and only chilled it if there were leftovers. I will definitely have to try chilling my cheesecake before serving next time.

I think the most important thing to remember about a cheesecake is that it's basically a custard pie, so it should be handled with care. It will not take kindly to overcooking or too high temperatures. It definitely follows the cardinal rule of cooking eggs - if it looks done in the pan, it will be overdone on the plate. I'll admit; I have had difficulty with this one. But, once I got over it, I could enjoy creamy, luscious cheesecakes and smooth, moist, even custardy, scrambled eggs, and omelets that don't taste like styrofoam.

A lot of people swear by baking cheesecakes in a water bath, but that's a problem if you use a springform pan. The great Alton Brown gets around this by using a 3" tall cake pan instead, but I'm rather attached to my springform. I get around it by putting the two racks in my oven in two adjacent slots with the top rack in the middle of the oven. On the bottom rack, I put a sheet pan filled with water. (Put the pan in first and then fill with water.) I put the water pan in the oven as soon as I finish baking the crust so the water has time to warm up and get the oven nice and steamy while I get the filling ready. Once the filling is ready and in the pan, that pan goes on the rack right above the water pan. It's protected from the harsher radiant heat from the coils at the bottom of the oven, and the cheesecake gets to cook in a nice moist environment. It doesn't coddle the cheesecake as much as a water bath would, but I think it's a good compromise.

The next thing is to not let the cheesecake overcook. I think this is where most cheesecakes go wrong. If you're paranoid about undercooking, you can turn off the oven when you think it's almost done. That will allow you a little more room for error. Although you're more likely to overcook it this way, it won't be as noticeable and will give you peace of mind if you're worried about eating undercooked eggs. (I say to get over it, but that's just me.)

If you're more worried about overcooking, like me, take the cheesecake out of the oven when the outer half is set, but the center still jiggles when you shake it. So, if you're using a 9" springform pan, you're looking for a jiggly circle between 4" and 5" in diameter when you shake the pan. And by shake, I mean wiggle back and forth on the oven rack horizontally, just so there's no confusion. I don't want anybody picking up the pan and shaking it up and down. That sounds like a good way to get boiling hot and probably pretty sticky cream cheese on yourself. Yikes!

If you're looking for a good recipe, I would highly recommend this one from Tigers & Strawberries. It has never failed me, and it's easy to customize.

-Katy
Bookmark and Share